
Mounting Solar Panels: How to Build A DIY Solar Panel Mounts
DIY Solar Power
DIY solar power is a great way to save on your electricity costs. By making your own solar PV module, you can reduce your energy consumption and lower your monthly bills. Additionally, building your own solar panel is a great way to become more self-sufficient and environmentally friendly.
DIY Solar Array
Building a DIY solar array is very similar to building a regular solar PV panel. As such, you’ll need to purchase the same items and do most of the steps in the same way. However, there are some steps that differ from those done when making a DIY photovoltaic panel for residential use, and that’s why these steps are also included below.
Frames
Regardless of whether you’re building your own solar panel for a commercial or residential application, making frames is the first step. You can purchase a pre-made wooden framework or create one from scratch.
Purchase Solar Cells
If you’re making your own DIY solar PV panel, you’re going to have to purchase a few items at a local hardware or electronics store, such as a solar cell and some wiring.
Build the Panel Box
Building a solar panel box is different than building an enclosure for your homemade power supply. Since you’ll be connecting the solar cells directly to each other, you’ll need to lay them out in a way that makes sense.
Wire the Panel
If you’re building your own solar panel for residential use, you probably know what kind of voltage and amperage your system needs.
Mounting solar panels
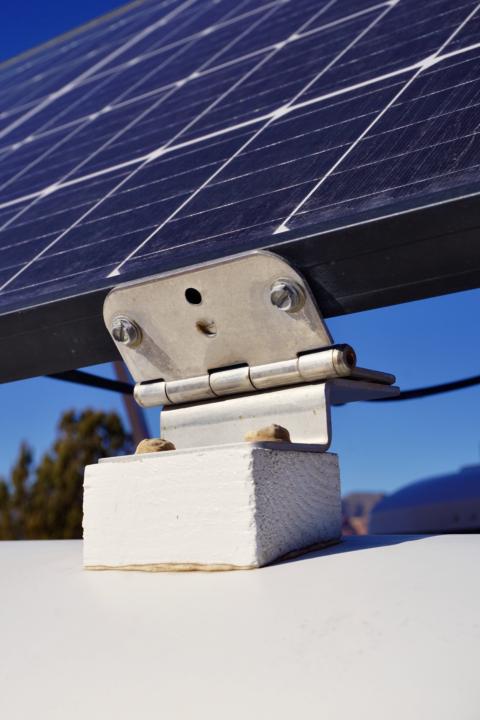
Mounting your homemade solar panel will be similar to mounting a normal solar panel. You should also consider having a tilt mount for wind and weather purposes.
DIY Solar Power Tips
Building your own solar panel is rewarding, but it’s not something you can do in one day or even a week. You’ll need to take your time and consider all of your options before getting started on the project itself. As for equipment, you’re better off renting some of the necessary tools and equipment to make your project easier and more successful.
Here are some tips to help you get started with your very own DIY solar power system. Keep in mind that while these tips can help get you started, it’s always best to consult a professional before starting any major home renovation project.
1. Start by installing solar panels on your roof.
2. Get a battery to store energy collected during the daytime.
3. Upgrade your home insulation to ensure you’re making the most of the energy you produce.
4. Make sure to use appliances that are compatible with solar power.
5. Connect your solar system to the grid to sell any excess power you generate.
6. Regularly check and maintain your system to ensure it’s running efficiently.
7. Educate yourself on solar power so that you can make the most of it in your home.
DIY Solar panel mounts
DIY solar panel mounts are a quick and easy way to reduce your energy bills by installing solar panels on the roof of your home. Many companies offer DIY kits with instructions, which help simplify the process and make it more affordable.
DIY Solar PV panel roof mount

Do it yourself roof mount panels are used to secure your solar panels to your roof or other outside structure. These mounts can be anything from simple brackets for homeowners who want to set up their solar array on the side of their home, to heavy-duty stands that hold the weight of large arrays in windy conditions.
DIY solar panel pole mounts
A DIY solar panel pole mount is a great option if you have a particularly tall structure on which you’d like to set up your system. For example, if you’d like it mounted off of the ground or need to put it in an area where trees will not grow, this option may be the best choice for you.
DIY solar panel stand kit for your home
Solar panels for homes can be constructed using a DIY solar kit available in the market. However, you can also build DIY solar panel stands to mount solar panels. There are many different options that are available with these kits and it is up to you which kind of stand suits your purpose.
Basic materials required for DIY solar panel stand
The basic materials that you require to build your own solar panel stand are:
Wood
You can use any type of wood for your stand, but make sure that it is strong enough to support the weight of your solar panel. You can buy wood from your local hardware store or you can use recycled wood if you have any available.
Contact cement
This is used to attach the solar panel to the stand. You can buy this from your local hardware store or online.
Electric drill
This is used to make holes in the wood for the screws.
Saw for cutting wood
This is used to cut the wood to the desired size.
Screws
You need screws to attach the solar panel to the stand. Make sure that the screws are long enough to go through the thickness of the wood and into the solar panel.
Solar panel stand legs
The solar panel stands legs are the most important component of the entire support mount. The legs of the solar panel stand need to be sturdy and strong as they will not only carry the weight of the solar panels but also your entire home’s electrical needs.
DIY solar panel mount rack
When you are looking for solar photovoltaic panel mounts, you can also look into the option of building your own. The DIY solar panel mounting rack is very similar to the commercial model that is available in the market when it comes to functionality; however, they do not need to be as sturdy as those racks which are specifically made for heavy-duty uses. The DIY stand can be built from wood and may include a solar panel tilts the mount to suit your requirements.
How to build a solar panel rack?
One way to make the installation process easier is to build a solar rack system. This will allow you to mount the panels securely and ensure that they are level.
You will need a few materials for this project, including plywood, L-brackets, and screws. Once you have gathered all of your materials, you can follow these simple steps to build your solar panel rack.
First, cut the plywood into four equal pieces. Then, use the L-brackets to attach the plywood pieces together. Make sure that the brackets are level so that your solar panel rack is stable. Finally, use screws to attach the solar panels to the rack. Start at the top and work your way down, making sure that each panel is level. With a little bit of effort, you can easily build a solar panel rack that will make installing your solar panels a breeze.
How to make a solar panel stand for a residential property
Homeowners who are considering making the switch to solar power may be wondering how they will go about mounting their solar panels. One option is to install a solar panel stand. Solar panel stands are an easy and cost-effective way to mount solar panels on a residential property. They are typically made of metal or plastic and can be placed on the ground or on the roof.
Solar panel stands can be purchased at most home improvement stores or online. Instructions for how to install a solar panel stand can be found in the owner’s manual for your particular model of solar panel. When installing a solar panel stand, it is important to make sure that the panels are level and that the stand is securely anchored to the ground or roof. Once installed, a solar panel stand will provide a stable and durable platform for your solar panels, ensuring that they remain safe and effective for years to come.
To build a solar panel stand:
1. Cut two pieces of 2×4 lumber to the desired height of the stand using a saw. The height will depend on the size and type of solar panel you are using.
2. Cut two more pieces of 2×4 lumber to 24 inches in length. These will be the supports for the stand.
3. Use a drill to make four holes in each of the two long pieces of lumber, spacing the holes evenly apart.
4. Place the short pieces of lumber into the holes so that they are perpendicular to the long pieces. Secure them in place with screws or nails.
5. Place your solar panel on top of the stand and secure it in place with screws or bolts. Be sure to use weather-resistant hardware if the panel will be exposed to the elements.
Now you have a sturdy stand for your solar panel! You can use this same process to make a stand for multiple panels if you want to generate more power for your home.
What type of mounting system is best for me?
There are many different solar PV panel mounting systems that allow you to get the most out of your solar panels. If you’re trying to decide on what type of system is best for your needs, consider these questions:
How much space do I have?
The surface area of your roof determines how big a solar panel array can be.
Can I easily access my roof?
Unless you plan on building scaffolding or hiring someone to build an extension ladder for you to reach your roof every time it needs to be cleaned, you need to make sure that your solar panels are easily accessible.
How much am I willing to invest?
There are different price ranges for solar panel brackets and mounts, and it’s important to buy what fits your budget.
Rooftop solar system
A rooftop solar system is designed to be installed on the roof of your home or business. Rooftop systems are typically connected to the grid (for net metering) and may also include an inverter, batteries, a DC disconnect switch, automatic meter readout equipment, etc. Roof mounting solar panels on your home can be a difficult DIY project. It involves cutting holes in the roof, and installing mounting brackets that are strong enough to hold up solar panels which can weigh over 100 pounds each.
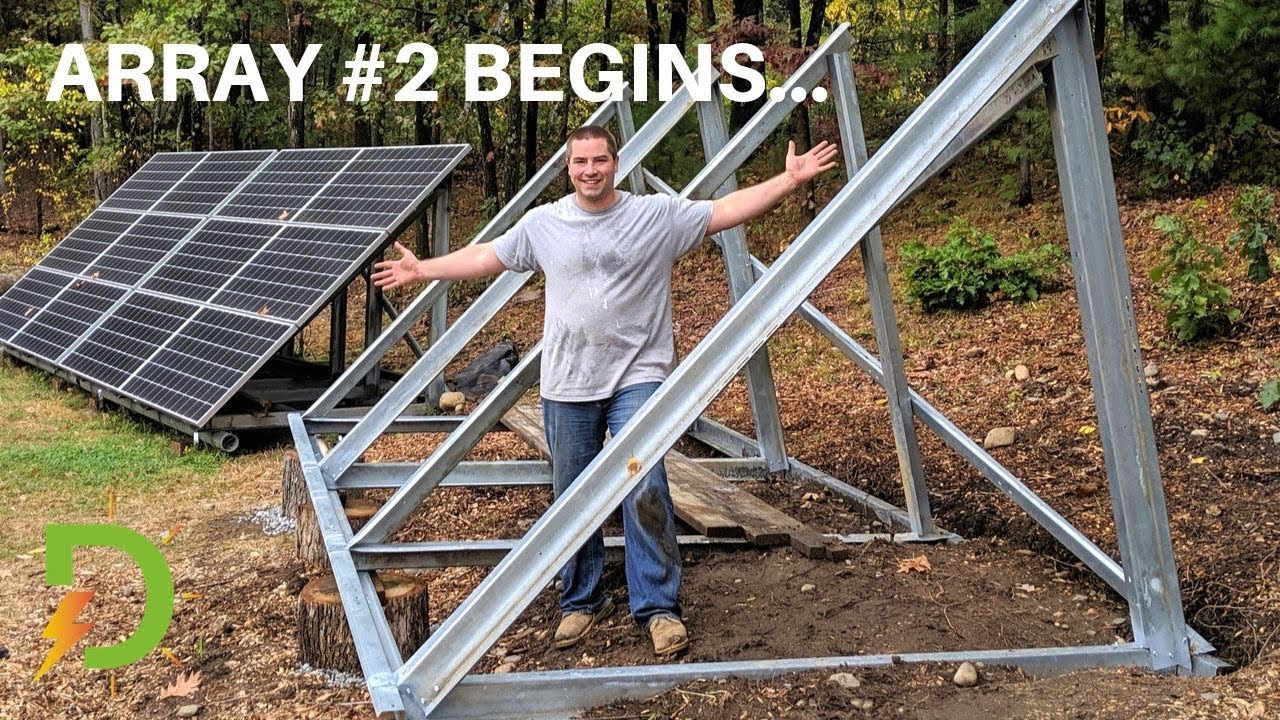
Ground mount solar system
Ground mount solar system is a solar energy system that contains photovoltaic modules and is designed to be installed on the ground. It can be mounted on concrete or wooden posts, depending on where it is located.
DIY Off Grid Solar System
An off-grid solar system is a type of stand-alone power system that uses PV modules or panels to generate electricity. The term “stand-alone” means not being connected to the utility company, so any energy generated by the system can only be used on-site with storage batteries. In most applications, off-grid solar is used as a substitute for existing power systems.
In some cases, an off-grid system can be a viable alternative to extending utility power lines to remote areas. In remote locations, the cost of building the distribution infrastructure would be prohibitively expensive. However, in most applications, home or cabin owners want electricity service for lighting, appliance use, and small office equipment.
Solar modules are unique in that they can supply usable power even when the sun is not shining. When combined with batteries and an inverter or charge controller, the solar energy collected during the day can be stored and used at night or whenever needed.
DIY Off Grid Solar Kit
Off-Grid DIY Solar Kit has grown in popularity, and If you’re planning to put solar panels on a smaller structure such as a holiday house or shed, it’s feasible to create your own standalone system. Solar system kits are easy-to-use and will certainly put you in charge of your own electricity usage.
This project is simple enough for anyone to take on and will not only save you money, but it gives you endless options to customize your DIY solar kits with ease!
This simple DIY Off Grid Solar Kit only takes a few hours and very few materials to make.
The first step is to gather all the materials needed.
Those materials are as follows:
- Solar Panels
- Deep Cycle AGM battery
- Solar Controller
- Battery Monitor
- Terminal Fuse Block
- 2-Gauge Red and Black battery cable
- AC Electric Fuse
- Terminal Ring Lug
- Cable Cutter/Stripper Tool
- Wire Nuts or Butt Connectors
Keep in mind that this project is not going to produce the amount of solar power you need for your entire house – it’s an off grid solar kit – however, if you have limited off grid power needs such as lighting, TV/stereo sound equipment, lights & fans on a cabin—this is perfect!
Assemble your DIY Off Grid Solar Kit
The best way to get started is to install your deep cycle AGM battery in an area where it’s protected from the elements (rain, snow, etc.) but accessible. Then run all of your cables and make sure you use cable lugs for positive (+) and negative (-) cable connections.
Use cable lugs for positive (+) and negative (-) cable connections
Once you’ve got everything connected you’re almost done! The last step is adding the solar monitor. It should be plugged into a nearby outlet inside your cabin.
Frequently Asked Questions
What are the benefits of solar mounts?
There are many benefits to installing solar panel mounts. Solar panel mounts can increase the lifespan of your solar panels by keeping them clean and free from debris, they can also increase the efficiency of your panels by providing a more stable platform, and they can protect your investment by deterring theft and vandalism.
How do I choose the right solar panel mount?
When choosing a solar panel mount, you will need to consider the size and weight of your solar panels, the intended use of the mount (for example, whether it will be used for residential or commercial purposes), and the climate in which it will be installed.
How do I install solar panel mounts?
Solar panel mounts can be installed with either concrete or ground screws. When installing with concrete, you will need to drill pilot holes and secure the mounts with expansion bolts. When installing with ground screws, you will simply screw the mounts into the ground using a power drill.
Can I install solar panel mounts myself?
Yes, you can install solar panel mounts yourself with relative ease. However, it is always recommended that you consult with a professional installer to ensure that the job is done properly.
Are solar panel mounts weatherproof?
Yes, solar panel mounts are designed to withstand all types of weather conditions.
How long do solar panel mounting last?
Solar panel mounts are designed for long-term durability and will last for many years with proper care and maintenance.