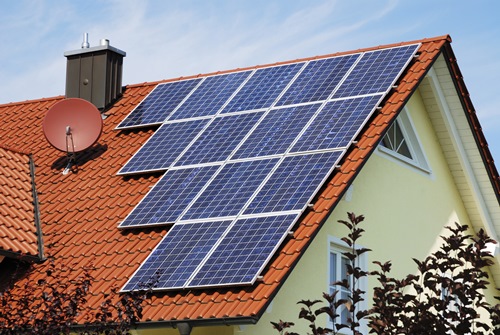
Mounting Solar Panels To Roof | How to Mount Solar Panels on a Roof
When it comes to harnessing the power of the sun and reducing our carbon footprint, solar panels have become an increasingly popular choice for homeowners. However, the success of a solar panel installation heavily relies on proper mounting techniques. In this article, we will discuss how to mount solar panels on a roof effectively and safely.
Step 1: Assessing the Roof
Before starting the installation process, it is essential to evaluate your roof’s suitability for solar panels. Factors such as roof orientation, pitch, and shading need to be taken into account. Ideally, your roof should have a south-facing aspect with minimal shading throughout the day. Additionally, the roof’s structure needs to be sturdy enough to support the weight of the solar panels.
Step 2: Preparing the Roof
Once you have determined that your roof is suitable for solar panel installation, the next step is to prepare the roof surface. Begin by cleaning the roof thoroughly to remove any dirt, debris, or moss. This ensures a clean and secure base for the mounting system. Additionally, inspect the roof for any damages or leaks that need to be addressed before proceeding further.
Step 3: Choosing the Mounting System
There are various mounting systems available, including roof-ground mounts and flush mounts. Each system has its advantages and considerations. It is crucial to select a mounting system that is compatible with your roof type and meets the local building codes and regulations.
Step 4: Installing the Mounting System
Follow the manufacturer’s instructions carefully to install the chosen mounting system. Typically, this involves attaching the mounting brackets or rails to the roof using stainless steel screws. Ensure that the mounting system is level and securely fastened to the roof surface.
Step 5: Attaching the Solar Panels
Once the mounting system is in place, it’s time to attach the solar panels. Begin by carefully lifting each panel onto the mounting system and aligning them correctly. Secure the panels to the mounting system using the provided clamps or brackets. Double-check the alignment and ensure that the panels are firmly attached.

Step 6: Wiring and Connection
After the solar panels are securely mounted, the final step is to connect them to your home’s electrical system. It is recommended to consult a professional electrician for this step to ensure a safe and efficient connection. The electrician will connect the panels to an inverter, which will convert the direct current (DC) generated by the panels into usable alternating current (AC) electricity.
In conclusion, mounting solar panels on a roof involves a systematic approach that begins with assessing the roof’s suitability and ends with a secure and efficient installation. By following the steps outlined in this article, you can ensure a successful solar panel installation that maximizes your energy savings and contributes to a greener future.
FAQs
How Far Off The Roof Should Solar Panels Be?

Solar panel mounts closer to a roof’s edge or exterior wall can affect the amount of electricity that your system generates. In fact, mounting solar panels too close to an exterior wall can cause shading issues and decrease energy efficiency by up to 10%.
While installing solar panels near the edge of a roof helps maximize energy production, it isn’t a requirement. You can make a decision based on how much space you have available on your roof and where your utility meter is located. When in doubt, consult with an installer or engineer to ensure mounting solar panels off the edge won’t cause either safety or energy problems.
How Do You Install Solar Panels On A Roof Without Drilling?
Installing solar panels to a roof without mounting brackets can be complicated and risky. If you want to decrease the amount of work involved with mounting your solar panels on top of your roof, mounting brackets are an integral part of the process.
Whether you’re mounting traditional crystalline or thin-film solar modules, it’s essential that they’re elevated above the roofline. This is because snow accumulates on roofs during winter months and can weigh down panels if too much snow collects on them while they’re horizontal. By elevating panels, snow will slide off more easily while also allowing precipitation to drain through access hatches in mounting brackets.
Why Should I Install Solar Panels System?
If you live in an area where the sun provides enough energy to power your home, a solar panel mount on your roof can be a great way to save money on your electric bill. It’s easier than you think, and mounting solar panels on your roof is just one of many ways that you can install them.
Should I use a ground mount solar system or rooftop solar?
There are many ways to install solar panels on the roof, which is why it’s important to discuss your options with an experienced installer or engineer before making a decision. Most mounting solar systems require wiring to reach solar inverters, but there are mounting brackets for direct current (DC) micro-inverters that can be installed behind solar panel arrays for easier maintenance. Solar panels installed on roofs are able to withstand high winds, snow loads, and other weather conditions.
