
How to mount solar panels on RV Roof | Installing Solar Panels To RV Roof
Installing solar panels on your RV roof can be a game-changer when it comes to your off-grid adventures. Not only can solar panels provide you with a sustainable and eco-friendly source of energy, but they can also save you money in the long run. However, the process of mounting solar panels on your RV roof may seem daunting at first. But fear not! With the right guidance and a little bit of know-how, you can successfully install solar panels on your RV roof and start enjoying the benefits of renewable energy.
Step 1: Planning and Preparation
Before you begin the installation process, it’s essential to plan and prepare adequately. Start by assessing your RV roof’s suitability for solar panel installation. Consider factors such as the available space, roof material, and sun exposure. Measure the area where you intend to mount the panels and ensure it can accommodate your desired panel size. Additionally, gather all the necessary tools and equipment required for the installation, such as brackets, fasteners, and a drill.
Step 2: Choosing the Right Mounting System
Selecting the appropriate mounting system is crucial for a successful solar panel installation. There are various options available, including flush mounts, tilt mounts, and adjustable mounts. Flush mounts are ideal if you want a sleek and low-profile look, while tilt mounts allow you to adjust the panel angle for maximum sun exposure. Consider your specific needs and preferences when choosing the mounting system that suits you best.
Step 3: Preparing the Roof Surface
Preparing the roof surface is an essential step to ensure a secure and long-lasting installation. Start by cleaning the roof thoroughly, removing any dirt, debris, or existing sealants. Inspect the roof for any damage or leaks and address them before proceeding. Apply a suitable sealant or adhesive to create a watertight seal between the mounting brackets and the roof. This step is crucial to prevent water infiltration and maintain the structural integrity of your RV.

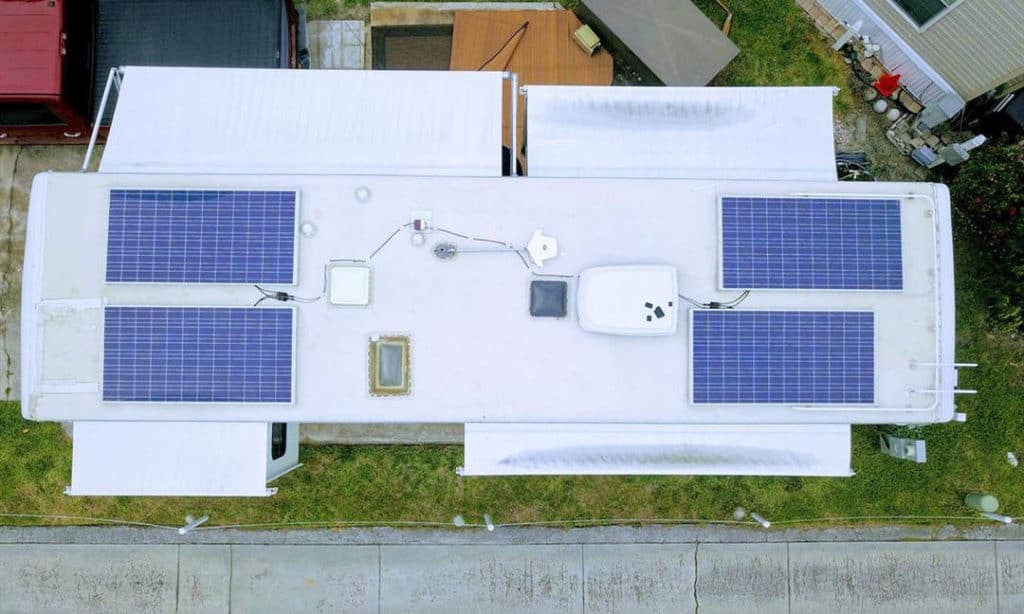
Step 4: Mounting the Solar Panels
Once the roof is prepped and ready, it’s time to mount the solar panels. Begin by attaching the mounting brackets to the roof surface, following the manufacturer’s instructions. Ensure that the brackets are securely fastened and evenly spaced. Next, carefully place the solar panels onto the brackets and secure them using the provided fasteners. Double-check the alignment and tilt angle to optimize sun exposure.
Step 5: Electrical Connections and Testing
The final step involves making the necessary electrical connections and testing the system. Connect the solar panels to a charge controller, which regulates the energy flow between the panels and your RV’s battery. Follow the manufacturer’s instructions for wiring and ensure all connections are secure. Once the connections are made, test the system to verify its functionality. Monitor the power output and make any adjustments if needed.
Congratulations! You have successfully installed solar panels on your RV roof. Now you can enjoy the benefits of clean and renewable energy while exploring the great outdoors. Remember to regularly maintain and clean your solar panels to ensure optimal performance. Happy solar-powered travels!
FAQs
How do you install solar panels on an RV without drilling?
If you are installing solar panels on an RV without drilling holes, there are a few options. If your vehicle has a rubber roof, then the best option is to install brackets that attach to the studs on the roof. For vehicles with a metal top, there are brackets that attach to ribs in the vehicle frame. Solar panel array brackets are available at most RV stores.
How to attach flexible solar panels on an RV roof
A great way to save money on power bills is to install flexible solar panels on the roof of your RV. Flexible solar panels are made with an aluminum frame and can be attached in a variety of ways, including using small screws or wire ties.
How do RV solar panels work?
RV solar panels are installed on the roof of your RV to make electricity from the sun’s energy. The mountable solar panel is connected with wire leads that are flexible so that it can be positioned and moved as needed.
The charge controller is the device that regulates and controls the current from a solar panel, which can be stored in batteries. The wires are connected to a battery or other electrical source so that it has power when needed without having to depend on electric outlets.
How long will a 12-volt deep-cycle battery last?
Batteries of this capacity can endure up to six years if properly cared for and charged. It is your responsibility to ensure that your charging procedure does not harm your battery. A volt deep cycle battery is a more expensive solution, but it is also more powerful and long-lasting than other types of batteries.
When is it a good idea to install insulation on the camper van roof?
Installing insulation on the roof of your campervan to store power and reduce eco tasks is a great idea. However, you’ll need to run cables and get access for the solar installation, or remove insulation, lining, and floor covering in an empty van before retrofitting. When retrofitting your campervan, consider how you’ll get the needed access when it’s time to install.